
ICE CREAM CONE CAKES!


   This recipe comes from www.thepinkwisk.com.uk .  They look like the real thing.  Probably pretty tasty too and you wouldn't have to worry about them melting.  Enjoy!

Ice Cream Cone Cakes


Anyone for ice-cream? Prefer some cake? - Hooray it’s both!


Ice-cream Cone Cakes – perfect for a little one’s birthday party. Who am I kidding??- Perfect whoever you are and whenever you feel like it! No complicated trickery involved these really are super easy. What are you waiting for…get on with it!


Ingredients:

12 Ice-cream cones with flat bases
200g Butter
200g Caster Sugar
4 Eggs
200g Self Raising Flour
2 tsp Vanilla Extract
For the icing:
225g Butter
450g Icing Sugar
1 tsp Vanilla Bean Paste
1 tbsp Milk
1 box of mini Chocolate Flakes
Plus a variety of cake sprinkles and ice-cream sauces – whatever takes your fancy!
Preheat the oven to 180c/160c Fan/350F/Gas Mark 4.


Prepare your baking pans, Use a muffin tin, one of the large type variety. Cut out 12 foil squares you will need them to be about 15cm square each. Press n one foil square into each hole. Next place your empty icecream cones onto each foil piece, shape the overhanging foil around the cone to create a support and keep them standing upright. You don’t need to be too neat with this just make sure they feel supported and aren’t going to topple over the minute you go to put them in the oven.


Make your cake mixture by creaming together the butter and sugar. Once light and fluffy add the vanilla extract and then one egg at a time making sure it is well mixed after each addition. Any sign of the mixture curdling add a tablespoon of the flour.
Once all the eggs are incorporated mix in the flour.
Fill each cone approx 2/3rds full.


Bob them into the oven for 18-20 minutes until fully cooked and a skewer comes out clean.
Magic – the cones don’t burn or go soggy from the mixture and you have beautifully cooked cakes!


Allow them to cool and then on with the decorating. Make up the buttercream by beating the butter to ensure it is super soft, then beat in the sifted icing sugar along with a tablespoon of milk and the vanilla bean paste.
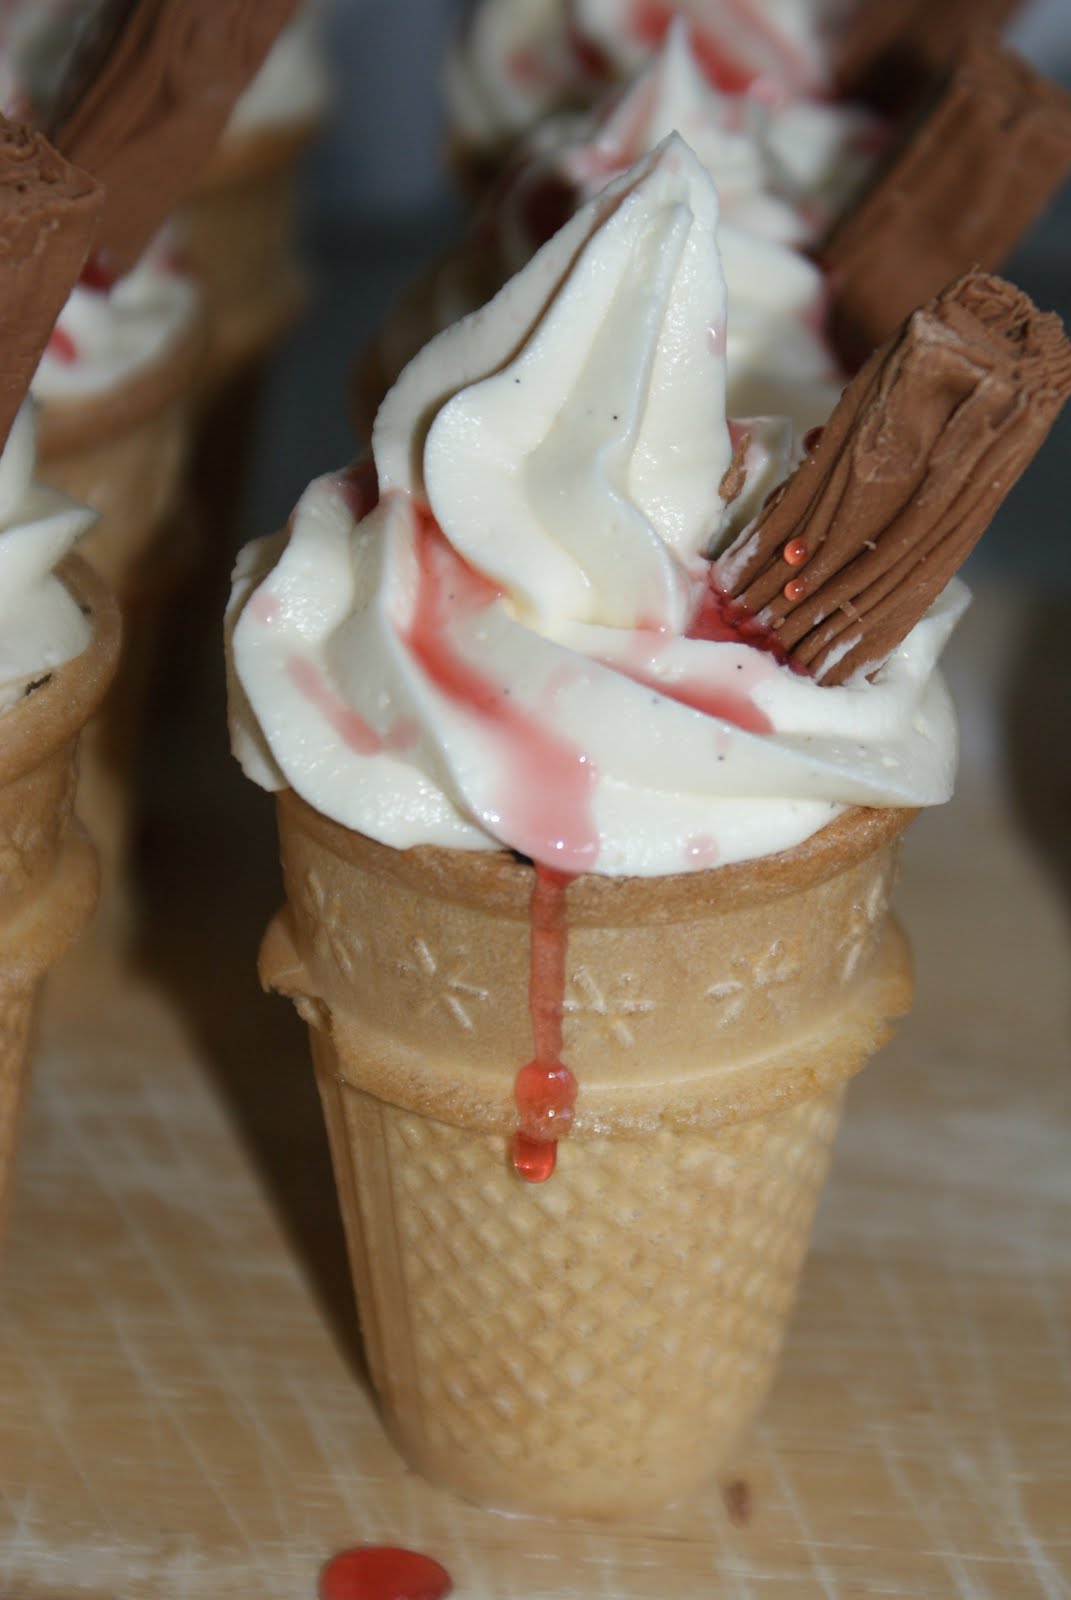
Add the butttercream to a piping bag with a star nozzle and pipe the Mr Whippy effect on top of the cakes. But we’re not done yet!
Take a mini flake and push it through the buttercream into the cake. I found they were just a smidgen to long so I cut a 2cm piece of each to make them the right size.
Unfortunately you will have to eat all these cut off pieces just like I did (there – my secrets out)!
Finally decorate them with sprinkles or ice-cream sauce – whatever you fancy.


Ice Cream Cone Cakes it’s as easy as that!

Comments

Popular posts from this blog

VANILLA PEACH COFFEE CAKE!!

Did you know that the fruit this summer is supposed to be the best it has been in years? Apparently, fruit loves hot weather. I personally have eaten more peaches and cherries this summer than I have in about five years just for that reason.  As I have been a little overzealous lately buying peaches and cherries I found myself with a few peaches that were going to be too ripe for me to eat on the same day. That is unless I wanted to have them for every meal plus a few snacks. So I decided to make this recipe for Vanilla Peach Coffee Cake.  Vanilla Peach Coffee Cake Adapted from  Allrecipes.com Batter: 2 eggs 1 C milk 1/2 C oil 1 tsp. vanilla 1/2 C  sour cream 3 C flour 1 C sugar 1 tsp. baking powder 1/2 tsp. salt 1/2 tsp. baking soda Topping: 5 or 6 large peaches, diced. 3 Tbsp. butter, melted 11/4 C brown sugar 1Tbsp. cinnamon 2 tsp. nutmeg 4 Tbsp. flour Vanilla Icing: 1 Tbsp. butter 1 tsp

PRESENT TOPIARY TO DECORATE YOUR PORCH AND FRONT DOOR!

   This comes from www.thatvillagehouse.blogspot.com .  I made something similar a couple years ago, without the pots.  It was about 6 feet high.  I got the inspiration from a Chirstmas dectoration that we bought at Target. This is a very good idea and make a great enterance to your home.  So here's a little something to thing about for next year.  Before you know it December will be here again.  You could also do something like this for an Easter theme.   Enjoy! A Merry Welcome! So here is my first Christmas project for the year!! I saw something similar at our church's Advent celebration & pretty much straight up copied it. I couldn't help it. It was love at first sight! I plan to make a 2nd stack to go on the other side of my door, so I'm not completely done, but I thought I would share it with you anyway. I started with 3 different sized boxes...9, 12 & 14 inch cubes. I used an ice pick to punch holes in each of them so that I could run

SAPPORO SNOW FESTIVAL FROM JAPAN!!!

     The Sapporo Snow Festival is a famous festival held annually in Sapporo, Japan, over 7 days in February.  Currently, Odori Park, Susukino, and Tsudome are the main sites of the festival.  The 2011 Yuki-matsuri dates are February 7th to the 13th.    The festival is one of Japan's largest and most distinctive winter events.  In 2007, about 2 million people visited Sapporo to see the hundreds of snow statues and ice sculptures at the Odori Park and Suskino sites, in central Sapporo, and the Satoland site.  The festival is thought to be an opportunity for promoting international relations. The International Snow Sculpture Contest has been held at the Odori Park sit since 1974, and teams from various regions of the world participate.      The subject of the statues varies and often features as event, famous building or person from the previous yer.  For example, in 2004, there were statues of Hideki Matsui, the famous baseball player who at that time pl