This diy comes from www.kdatydidandkid.com . Very cool, I like this!

It cost all of 3 bucks to make, but I think the finished result looks quite elegant, almost like a feather boa.
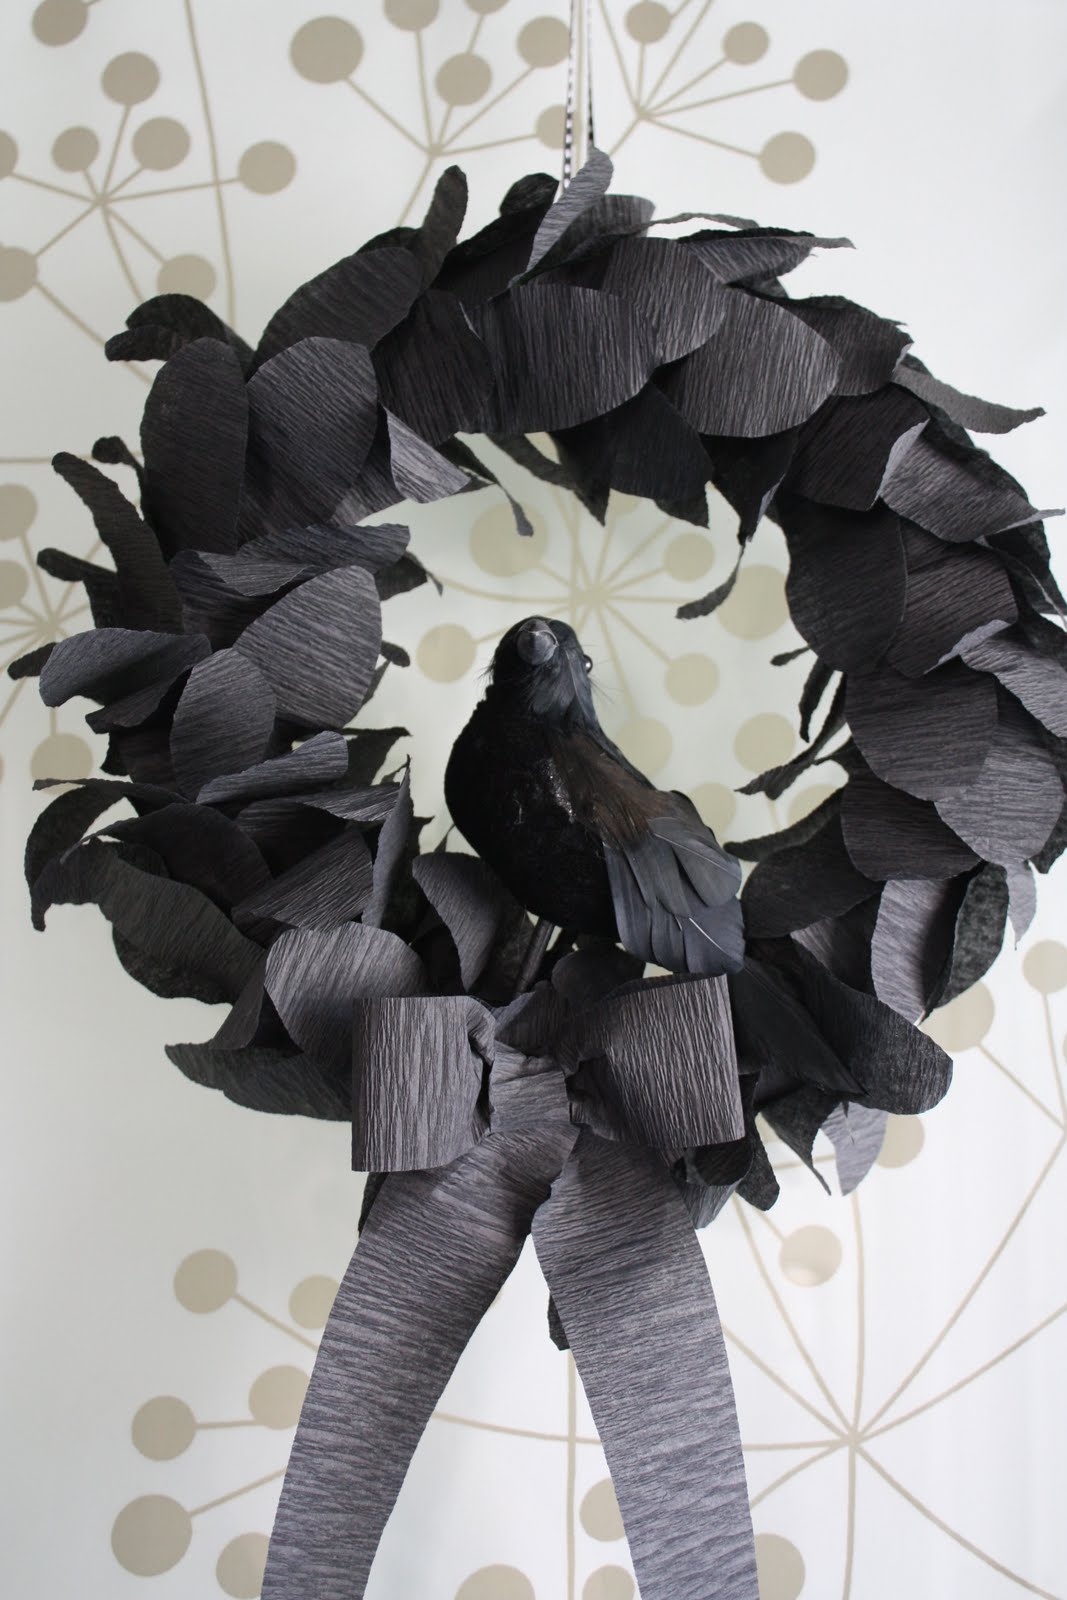
 Here's the wreath hung on the back door
I purchased a foam wreath, a fake raven, and a roll of black crepe paper (it also came with an orange roll, but I need to figure out something to make with that). I also used scissors and Glue Dots that I had on hand to use for adhesive, but you could certainly use hot glue, a stapler, or other binding agent (within reason).
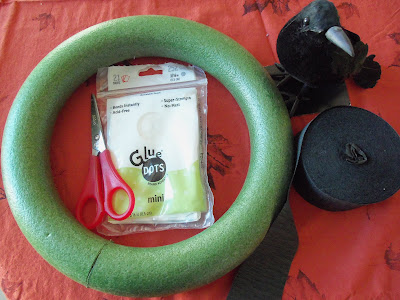
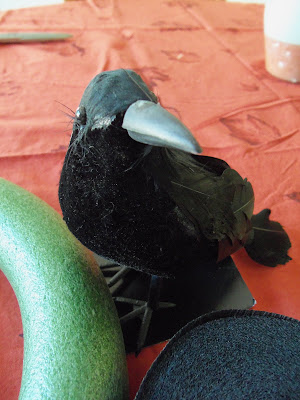
I'm a big fan of black birds, crows, ravens, etc., so I thought this bird would look spooky perched on the wreath.
Now I can't get Edgar Allen Poe out of my head: "Quoth the raven, "Nevermore!"" Hence I leave you with the Nevermore Wreath.
So here's what I did:
STEP ONE
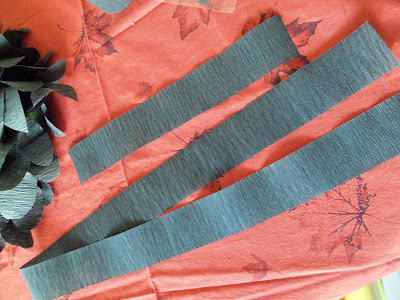
Cut a length of crepe paper, roughly a yard long. Fold it in half and cut it at the end, fold it again and again until you have a bunch of pieces that are 3-4" long (on the left, in photo below). You could cut them individually, but I find that the folding method makes quicker work of it.
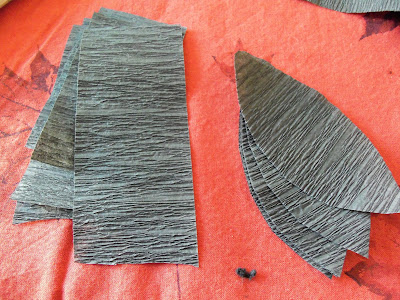
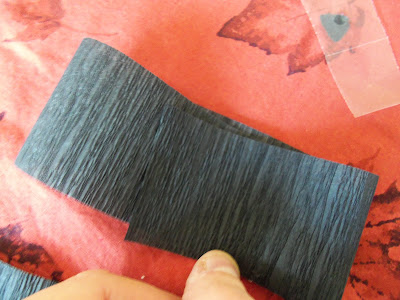
Holding the stack of crepe paper as seen above (on the left), cut out a shape that looks rounded like a feather. Get rid of those points on the end like in my photo!
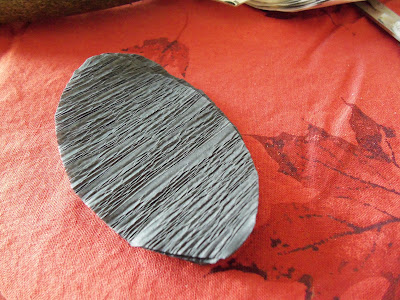
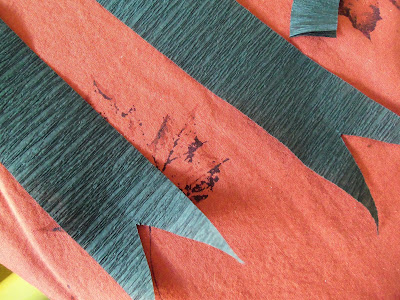
Ah, much better. Also, cut a stack of ones just slightly smaller. The variety helps make it look nicer, in my opinion.

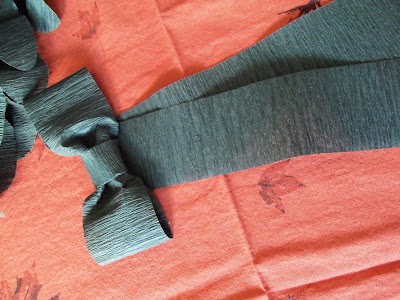
Now you have a stack of "feathers" to start adhering to your wreath form. I made more stacks periodically while creating the wreath.
STEP TWO
Before assembling your wreath, I highly suggest spray painting it black or wrapping crepe paper around it (gluing periodically as you go) to hide the green. An unfortunate result of gravity, the crepe paper feathers will "wilt" after a week or two of hanging up.
Once your wreath is ready to go, Glue your feather shapes onto the wreath. I started in the middle and worked my way to the outside, layering as I went. The Mini Glue Dots were really handy with this project.

I kept up this pattern of layering all the way around the wreath, making sure to glue the next line of feathers overlapping the previous line by about a half inch.

It's slow and steady work, but in all this entire wreath took me about an hour to do.

STEP THREE
Once you've made it all the way around, it's time to close the gap.

Gently tuck in some more feathers underneath the row you first started with. You might have to hold the wreath vertically and let those first feathers fall open to get the finishing feathers tucked inside (and glued, don't forget that!)

Fill in any other gaps or places you might see the green wreath peeking through.
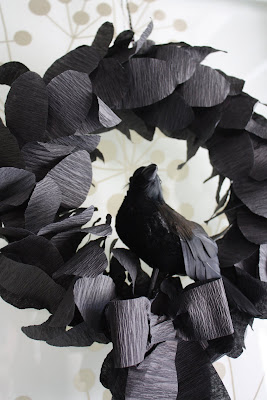
 The raven, minding the gaps
STEP FOUR
Ta da! The wreath is done!

Now time to attach the bird. He has wired feet, so this is an easy task.

I clipped the wire a bit and just stuck the wire into the wreath where I wanted him.

STEP FIVE
Add a ribbon. If I had found a nice, black, satin-y ribbon at the dollar store, I would have bought it. I thought I had some at home, but didn't (too many funeral gift wrapping projects--kidding!), so I just made a crepe paper ribbon.
Take a long piece (about a yard) and two shorter pieces (6") of crepe paper.
Fold the shorter piece into a loop and secure.

Pinch the "tube" in the middle, creating a bow tie, and secure the other short piece around the middle to hold it. Glue or tape it around the back.

Cut a notch on each end of the longer streamer to make it fancy,
and glue to the back of the bowtie. Pin or glue the entire ribbon onto the foam wreath.
STEP SIX
Add a piece of coordinating ribbon or a hanging hook to the back. I simply stuck two pins into the ribbon through the back of the wreath for hanging.

Fluff out your feathers, and display most graciously, I mean, ghoulfully!
I can't wait to hang it up this Halloween! I have a feeling I might just have to make one for the back door too.

Nevermore Halloween Wreath {Tutorial}
One of my favorite holidays is just around the corner--Halloween! I love everything about it, from the chill in the air, to crackly, curled up leaves on the sidewalks, to costumes and spooky decor. In the spirit of the holiday, I decided to craft a goth-like wreath for the front door, using stuff I found at the local dollar store.
It cost all of 3 bucks to make, but I think the finished result looks quite elegant, almost like a feather boa.
 Here's the wreath hung on the back door
I purchased a foam wreath, a fake raven, and a roll of black crepe paper (it also came with an orange roll, but I need to figure out something to make with that). I also used scissors and Glue Dots that I had on hand to use for adhesive, but you could certainly use hot glue, a stapler, or other binding agent (within reason).

I'm a big fan of black birds, crows, ravens, etc., so I thought this bird would look spooky perched on the wreath.

Now I can't get Edgar Allen Poe out of my head: "Quoth the raven, "Nevermore!"" Hence I leave you with the Nevermore Wreath.
So here's what I did:
STEP ONE
Cut a length of crepe paper, roughly a yard long. Fold it in half and cut it at the end, fold it again and again until you have a bunch of pieces that are 3-4" long (on the left, in photo below). You could cut them individually, but I find that the folding method makes quicker work of it.

Holding the stack of crepe paper as seen above (on the left), cut out a shape that looks rounded like a feather. Get rid of those points on the end like in my photo!

Ah, much better. Also, cut a stack of ones just slightly smaller. The variety helps make it look nicer, in my opinion.

Now you have a stack of "feathers" to start adhering to your wreath form. I made more stacks periodically while creating the wreath.
STEP TWO
Before assembling your wreath, I highly suggest spray painting it black or wrapping crepe paper around it (gluing periodically as you go) to hide the green. An unfortunate result of gravity, the crepe paper feathers will "wilt" after a week or two of hanging up.
Once your wreath is ready to go, Glue your feather shapes onto the wreath. I started in the middle and worked my way to the outside, layering as I went. The Mini Glue Dots were really handy with this project.

I kept up this pattern of layering all the way around the wreath, making sure to glue the next line of feathers overlapping the previous line by about a half inch.

It's slow and steady work, but in all this entire wreath took me about an hour to do.

STEP THREE
Once you've made it all the way around, it's time to close the gap.

Gently tuck in some more feathers underneath the row you first started with. You might have to hold the wreath vertically and let those first feathers fall open to get the finishing feathers tucked inside (and glued, don't forget that!)

Fill in any other gaps or places you might see the green wreath peeking through.
 The raven, minding the gaps
STEP FOUR
Ta da! The wreath is done!

Now time to attach the bird. He has wired feet, so this is an easy task.

I clipped the wire a bit and just stuck the wire into the wreath where I wanted him.

STEP FIVE
Add a ribbon. If I had found a nice, black, satin-y ribbon at the dollar store, I would have bought it. I thought I had some at home, but didn't (too many funeral gift wrapping projects--kidding!), so I just made a crepe paper ribbon.
Take a long piece (about a yard) and two shorter pieces (6") of crepe paper.

Fold the shorter piece into a loop and secure.


Pinch the "tube" in the middle, creating a bow tie, and secure the other short piece around the middle to hold it. Glue or tape it around the back.

Cut a notch on each end of the longer streamer to make it fancy,

and glue to the back of the bowtie. Pin or glue the entire ribbon onto the foam wreath.

STEP SIX
Add a piece of coordinating ribbon or a hanging hook to the back. I simply stuck two pins into the ribbon through the back of the wreath for hanging.

Fluff out your feathers, and display most graciously, I mean, ghoulfully!

I can't wait to hang it up this Halloween! I have a feeling I might just have to make one for the back door too.

Comments
Post a Comment