I don’t know about you, but when it comes to picking a Halloween costume I am not the most proactive. Whether it be shopping for a costume or even deciding what I want to be that year. Out of the past three years I think I have only had one costume selected before the night of, and it was only the day before that I had one that year. However not everyone procrastinates their costumes like I do.
At the afterschool program I work, as soon as October started the kids began asking what costume I had chosen to wear for Halloween. Some of the better suggestions I was offered included robot, skeleton, dinosaur, and some others. Department stores start their preparation way before any of us are even ready to accept the Summer is over and soon after Thanksgiving is shoved down our throats. Don’t get me wrong I love holidays, but the way they are commercialized these days just takes the joy out of them.
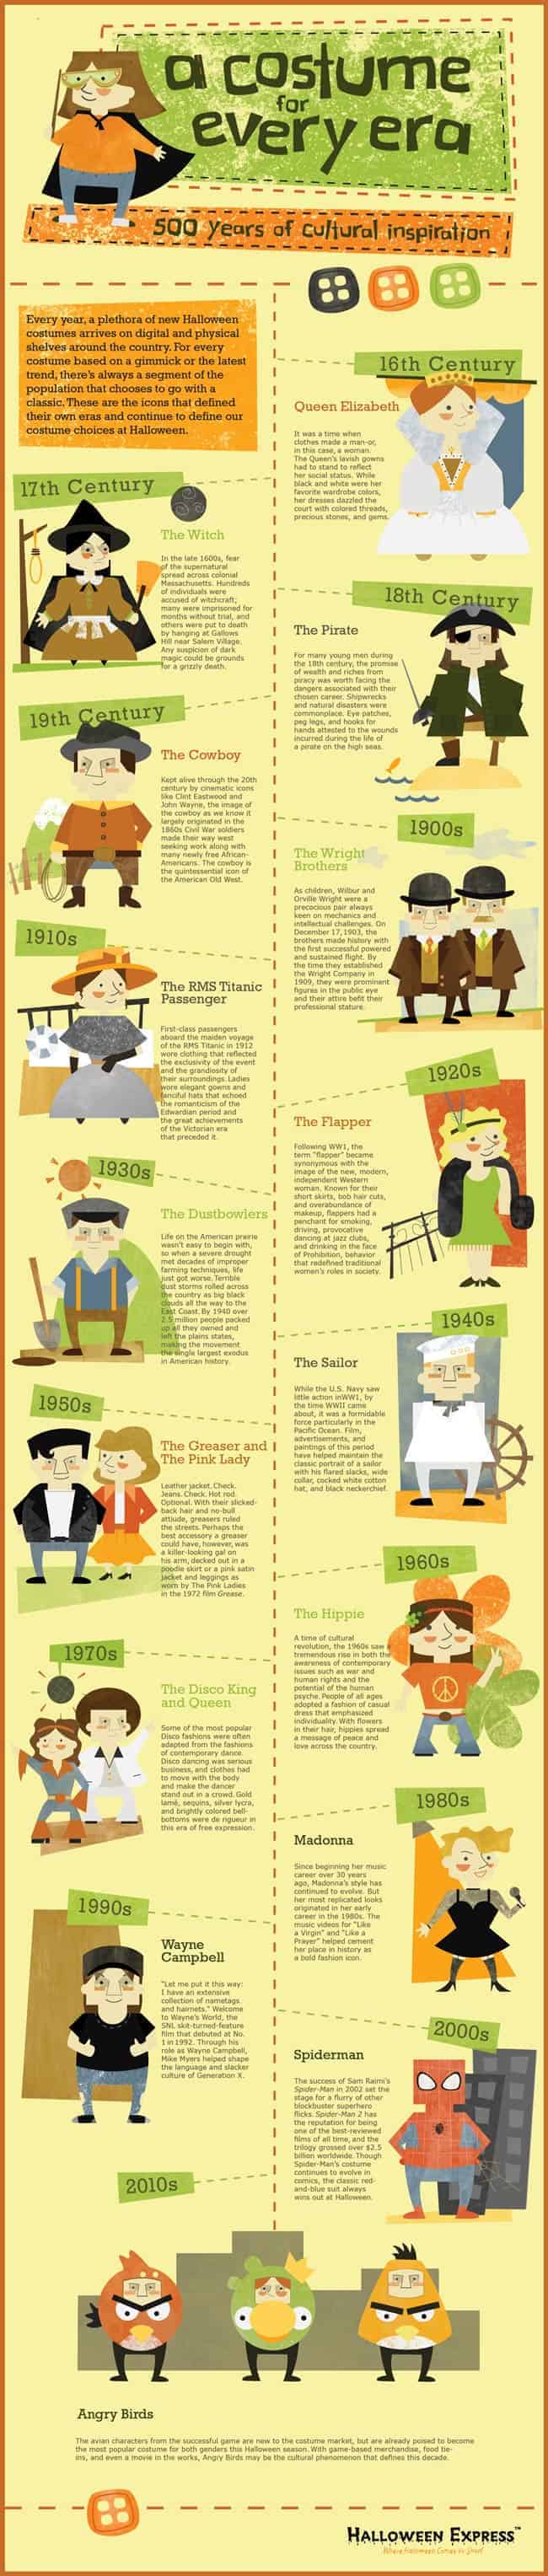
Today’s infographic A Costume for Every Era: 500 years of cultural inspiration gives us a look at the costumes we have worn over the ages and their inspiration. While one of today’s more popular costumes may be Angry Birds back in the 16th century Queen Elizabeth was one of the more popular costumes. Enjoy today’s infographic and let us know what you are planning for Halloween here! [Halloween Express]
Click to enlarge

At the afterschool program I work, as soon as October started the kids began asking what costume I had chosen to wear for Halloween. Some of the better suggestions I was offered included robot, skeleton, dinosaur, and some others. Department stores start their preparation way before any of us are even ready to accept the Summer is over and soon after Thanksgiving is shoved down our throats. Don’t get me wrong I love holidays, but the way they are commercialized these days just takes the joy out of them.
Today’s infographic A Costume for Every Era: 500 years of cultural inspiration gives us a look at the costumes we have worn over the ages and their inspiration. While one of today’s more popular costumes may be Angry Birds back in the 16th century Queen Elizabeth was one of the more popular costumes. Enjoy today’s infographic and let us know what you are planning for Halloween here! [Halloween Express]
Click to enlarge
Comments
Post a Comment