This great tutorial was found at www.lifeartcollide.blogspot.ie . Being a home haunter and loving Halloween, this hit me right between the eyes, as something I've always wanted to do. These are really cool and would make great pics to have around during Halloween.
Making your own freaky family photo arrangement is super simple using PSE (Photoshop Elements). You don't need any previous experience manipulating photos to create these fun portraits.
Over the summer I scoured garage sales for used picture frames, never paying more than 50 cents per frame! Believe me, people were more than happy to get rid of them. I often went home with an armload for less than one dollar.
Here are some of the before and after examples I used. The pictures are greatly altered in the final product so the original person is unrecognizable . To find suitable photos hop on the net and type "Victorian portrait photography" in the search engine, that will give you a nice selection to play around with. I also used "skull", "ghoul", "ghost", etc.
 Here's how you do it:
Have fun haunting your house with your new freaky family!
Make Your Own Freaky Family Portraits For Halloween
 |
Making your own freaky family photo arrangement is super simple using PSE (Photoshop Elements). You don't need any previous experience manipulating photos to create these fun portraits.
Over the summer I scoured garage sales for used picture frames, never paying more than 50 cents per frame! Believe me, people were more than happy to get rid of them. I often went home with an armload for less than one dollar.
Here are some of the before and after examples I used. The pictures are greatly altered in the final product so the original person is unrecognizable . To find suitable photos hop on the net and type "Victorian portrait photography" in the search engine, that will give you a nice selection to play around with. I also used "skull", "ghoul", "ghost", etc.

 | ||
| Open PSE and select two saved photos you want to merge. |
 |
| Click File, then New, then Photomerge Faces |
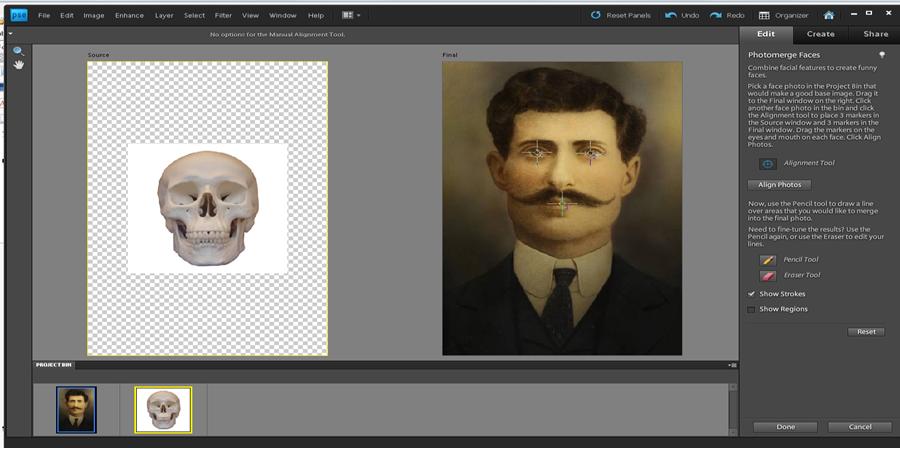 | ||
| Use the Alignment tool to mark each photo |
 |
| Use the Pencil and Eraser tool to merge your selections |
 | |
| When your happy with your final portrait click Done, then print it out. FINISHED! |
Fun - I also like to do other things on photo shop like use the magic wand tool to decapitate heads and the magic erase tool too make them invisible. I will have to give photomerge a try! Thanks for the idea.
ReplyDeleteGood luck. Let me know how things turn out. Shoot me a pic so I can see what they look like.
ReplyDelete