This diy comes from www.makethebestofthings.blogspot.com . I used to buy a special crackling medium that would cost quite a few bucks, but know anyone can get the same look for next to nothing. Good luck and enjoy!
Crackle finish with Elmer's Glue
Thanks to Dollar Store Crafts for featuring this post!
For years whenever I wanted a cool crackled effect on my painted projects I used the very expensive (to me) crackle medium and even bought some paints that were supposed to crack on their own. Because of the cost I did not do anything large and I was sparing in what I did do. Well, thanks to this cheap alternative, I can go a bit crazy and experiment because I found out how to get the crackle effect with Elmer's Glue! It's alot less expensive than any size bottle of crackle medium and just before school it's downright CHEAP.

I've been doing this for awhile but if you go to the Elmer's faq site, you can see the instructions towards the bottom of the page. Four sentences of instructions. Four sentences! I had more than four sentences worth of questions when I first did this!
On their page Elmer's used wood glue. I used Elmer's school glue or multi purpose glue for ALL of my projects and have always had great results. Even the Dollar Store no name glue works in a pinch. I have never had a "failure to crackle" with these glues.
So this tutorial, as requested, will have lots of pictures and step by steps so you can see what to expect. If you have used crackle medium you know the basics, they are the same, but you will use Elmer's glue. I used multi purpose but I see online that others have used the school glue and even generic school glues. For this project I used Elmer's.

I painted this piece of foam board with flat black acrylic. This is my base coat.

Here is the piece of painted foam board and a piece of painted muslin I have smeared with a generous amount of glue. I used alot so it would show up in the pictures. Let the glue dry til it is tacky, just a few minutes, then paint your contrasting base coat on top. Do NOT wait for the glue to dry all the way or the top coat will not crack. This is one point that you desire tackiness, lol! Let's call it sticky. Alrighty then. For these pics I did NOT thin the top coat of paint.

Try to use long strokes in one direction when painting your top coat. Do not go back and forth. Use long, steady strokes to cover your entire base coat with your top coat. Here is the foam board within a few minutes of painting the top coat of white paint. You can see the cracks forming pretty quickly, it is cool to watch!

Here is the top coat on the painted muslin.

And here is the painted muslin with the crackle effect. Since the muslin has a bit of give the cracks are smaller than the cracks on the wood board.

Here are two more pieces of painted muslin. The piece on the left is painted using turquoise and black. The black on the top left piece has been thinned slightly. The turquoise on the bottom left has not been thinned so it's cracks are not as delicate as the black. The big piece of fabric on the right has been undercoated with burnt umber and chocolate brown, then top coated with THINNED glue and THINNED white paint. The cracks are very small and delicate and hard to see in the pic. They are what I prefer for a doll face or something with alot of fine detail.
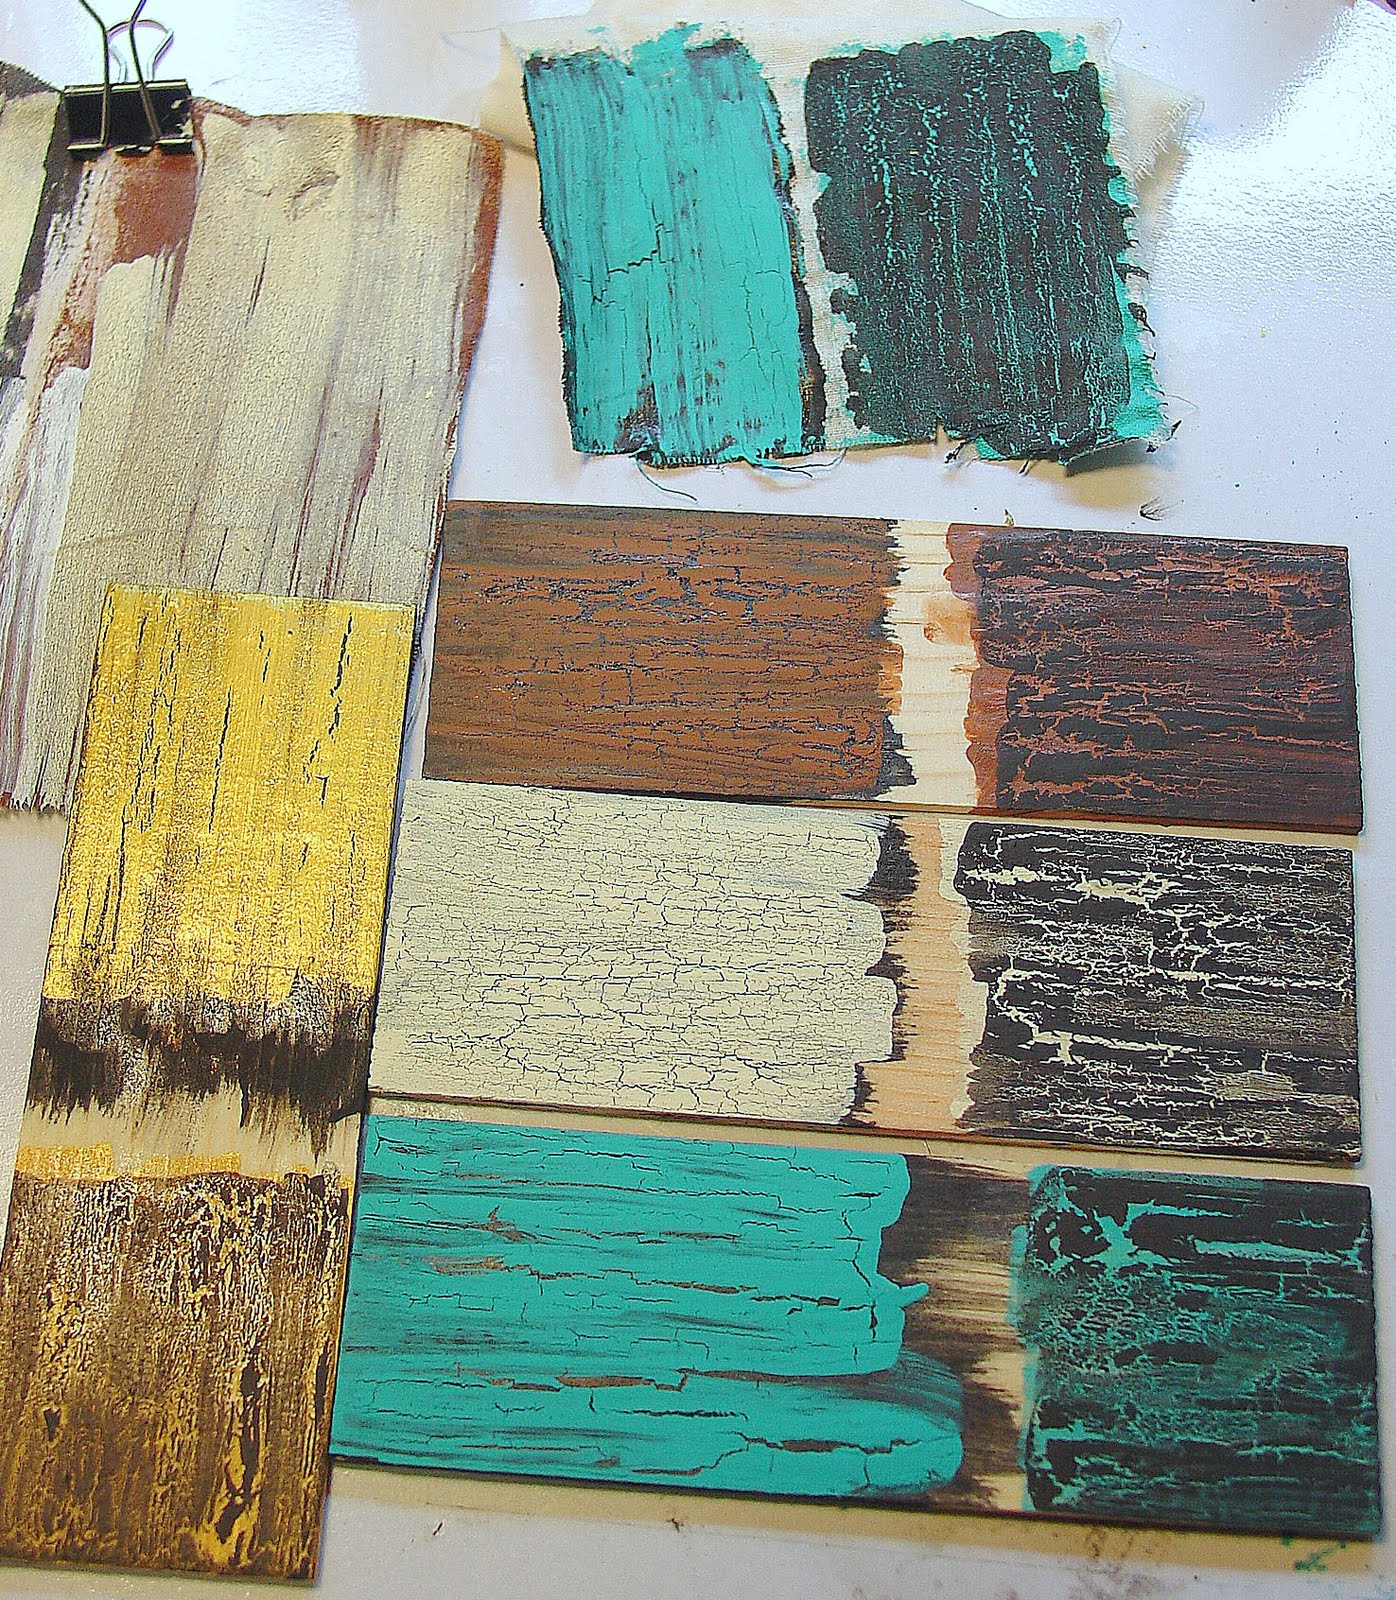
And here are some close ups of my sample boards. I tried to give you lots of pics so you can see what to expect when trying this technique.
 |
Foam board with black base coat and white top coat. Glue is not thinned and either is the white paint. Board is about 2" x 4".
 |
The wood boards in the following pics are about 1.5" tall x 5" wide.
Base coated brown on the left and black on the right. Glue is not thinned. Top coat of black on the left is thinned alot, brown top coat on right is thinned just a little.
Black base on the left, turquoise/teal base coat on the right. Glue is not thinned. Turquoise/teal top coat is not thinned. Black top coat on right is thinned alot, very watery.
I used gold Patio Paint for this board and it reacts differently to the glue. Perhaps because Patio Paint stretches a bit? The base coat on the left is P P gold with a watery black top coat. The base coat on the right is black with a Patio Paint top coat. It cracked, but not much. The glue was not thinned for this board.
I hope I've given you enough options that you can see what to expect with this technique. I would suggest experimenting a little til you find the combination that you like the best before using it on a final project. But have fun, it's easy to do and it's really really CHEAP!
Comments
Post a Comment